Set up/University account
University account setup
Four steps that take about two minutes.
How to set up
If you see a warning that Google hasn’t verified this app, your university has set up permissions differently than expected. Nothing is broken. The personal Gmail setup walks you through that screen.
1Make your own copy of the sheet
Open the template. Google shows you a Copy document box straight away. Give it any name you like and click Make a copy.
A yellow note appears in that box saying an Apps Script file and functionality will also be copied. That is Google’s name for Blotter itself, the part that does the work. Seeing it means the copy is arriving complete.
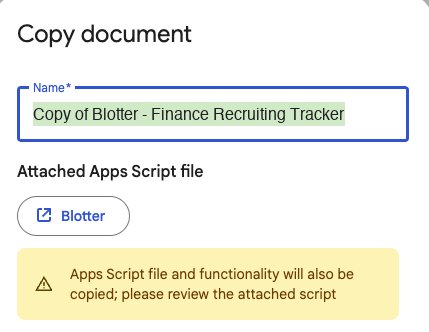
The copy lands in your own Google Drive. It is yours.
2Open the Blotter menu in your copy
In your new copy, look along the top menu bar. To the right of Help there is a menu called Blotter. Open it and click Step 1: Set up this sheet.
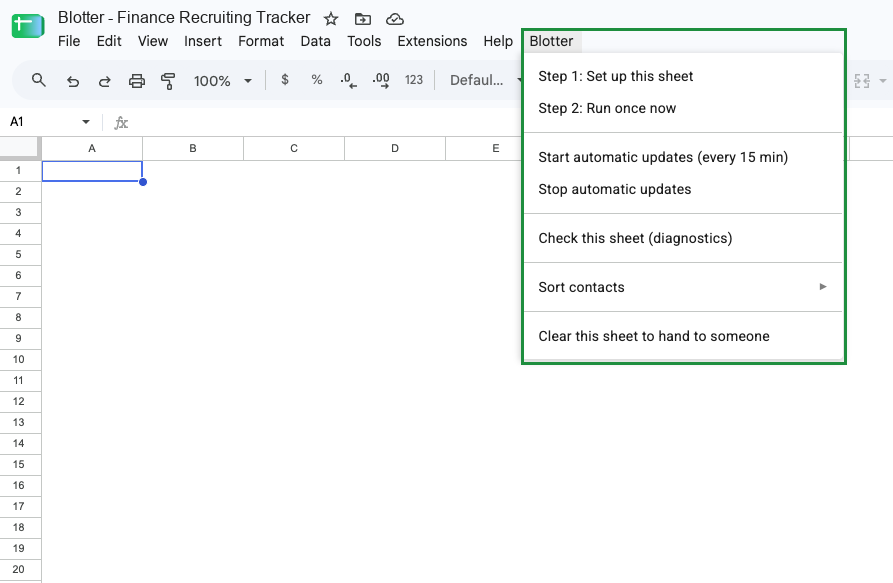
A yellow bar may appear across the top first, saying some formulas are trying to send and receive data from external parties, with an Allow access button. Click it. That is the picture on the Start here tab loading from blotterib.com, and Google asks before any sheet fetches anything from outside itself.
If the menu is not there, wait a few seconds and reload the page. If it is still missing, make the copy again. A copy occasionally arrives without Blotter attached, and a second copy fixes it.
3Give it permission. Tick Select all.
Google asks what Blotter is allowed to do. The screen is headed Blotter wants access to your Google Account, with your university address underneath.
Tick Select all, then click Continue.If you don’t select all, Blotter will not run correctly.
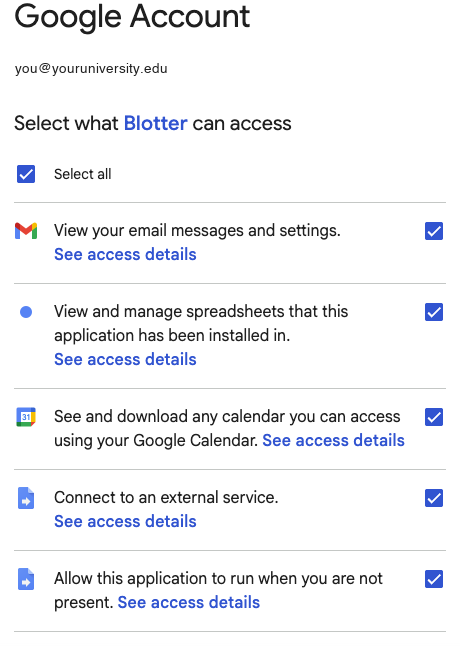
Google’s wording is broad, because it is the same wording for every app that asks. What each one is for here:
- View your email messages and settings. To see who you have written to and heard back from. Envelopes, not contents.
- View and manage spreadsheets that this application has been installed in. To write the answers back into your tracker. That is this one file.
- See and download any calendar you can access. To spot that a call has been scheduled without you entering it.
- Connect to an external service. To ask Blotter’s server what the updates should be.
- Allow this application to run when you are not present. So it can refresh every fifteen minutes on its own.
4Go to the Start here tab
That is the website’s part done. Everything else happens in your sheet, and it walks you through it.
Along the bottom of your copy there is a tab called Start here. Open it and follow it down. It covers your settings, adding the people you are networking with, and switching on the automatic updates.
If you are having issues, email blotterib@gmail.com for help.
To stop Blotter entirely, choose Stop automatic updates from the Blotter menu, or remove its access from your Google account permissions. Deleting the spreadsheet removes it too. Nothing of yours is held anywhere else.